Monday, December 21, 2020

The Goose That Keeps On Giving


*This post takes place over a span of three weeks.*


I've been feeling blocked this week creatively.

I've been trying to push through it and keep up all the other tasks that I have been focused on.  

For example, I was able to wear pants I haven't worn in six years and they were loose which they never were before.  I have been rediscovering clothes that I love that have been just waiting for me in my closet.

I've been working on a part of my holiday shopping each day and I am almost done.  I am still waiting for our cards to arrive so I can work on them and I have some secret gifts I need to mail out.  

I have finished my part of cleaning up the basement in prep for a new floor.  Because of the surge in COVID cases around here, we do not know when we will be able to put it in but at least when we can, we will be able to.  I am going to help hubby clean up his room if he needs me but now he needs to go through all his stuff.

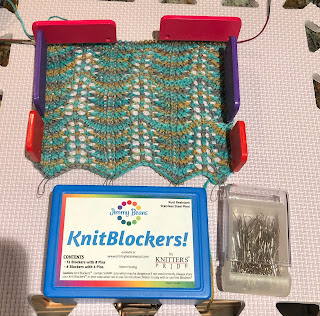
My mind wants to design a memorial in our Family Server for a friend and member that we lost.  😭  I feel like I have to do something but I need to be working on my design.

I have failed a number of times at getting this design to work and failure teaches me what not to do next time but I just keep failing.

I am trying a new idea today and we will see what happens with that.

The trick over the years that I have worked hard to emulate is that just because I have failed in this task, it doesn't make me a failure.
Failure is a bruise, not a tattoo.  - John Sinclair
I like that quote.  So, I will continue trying new things until I get that "aha" moment where everything clicks and a new design is born.

*****

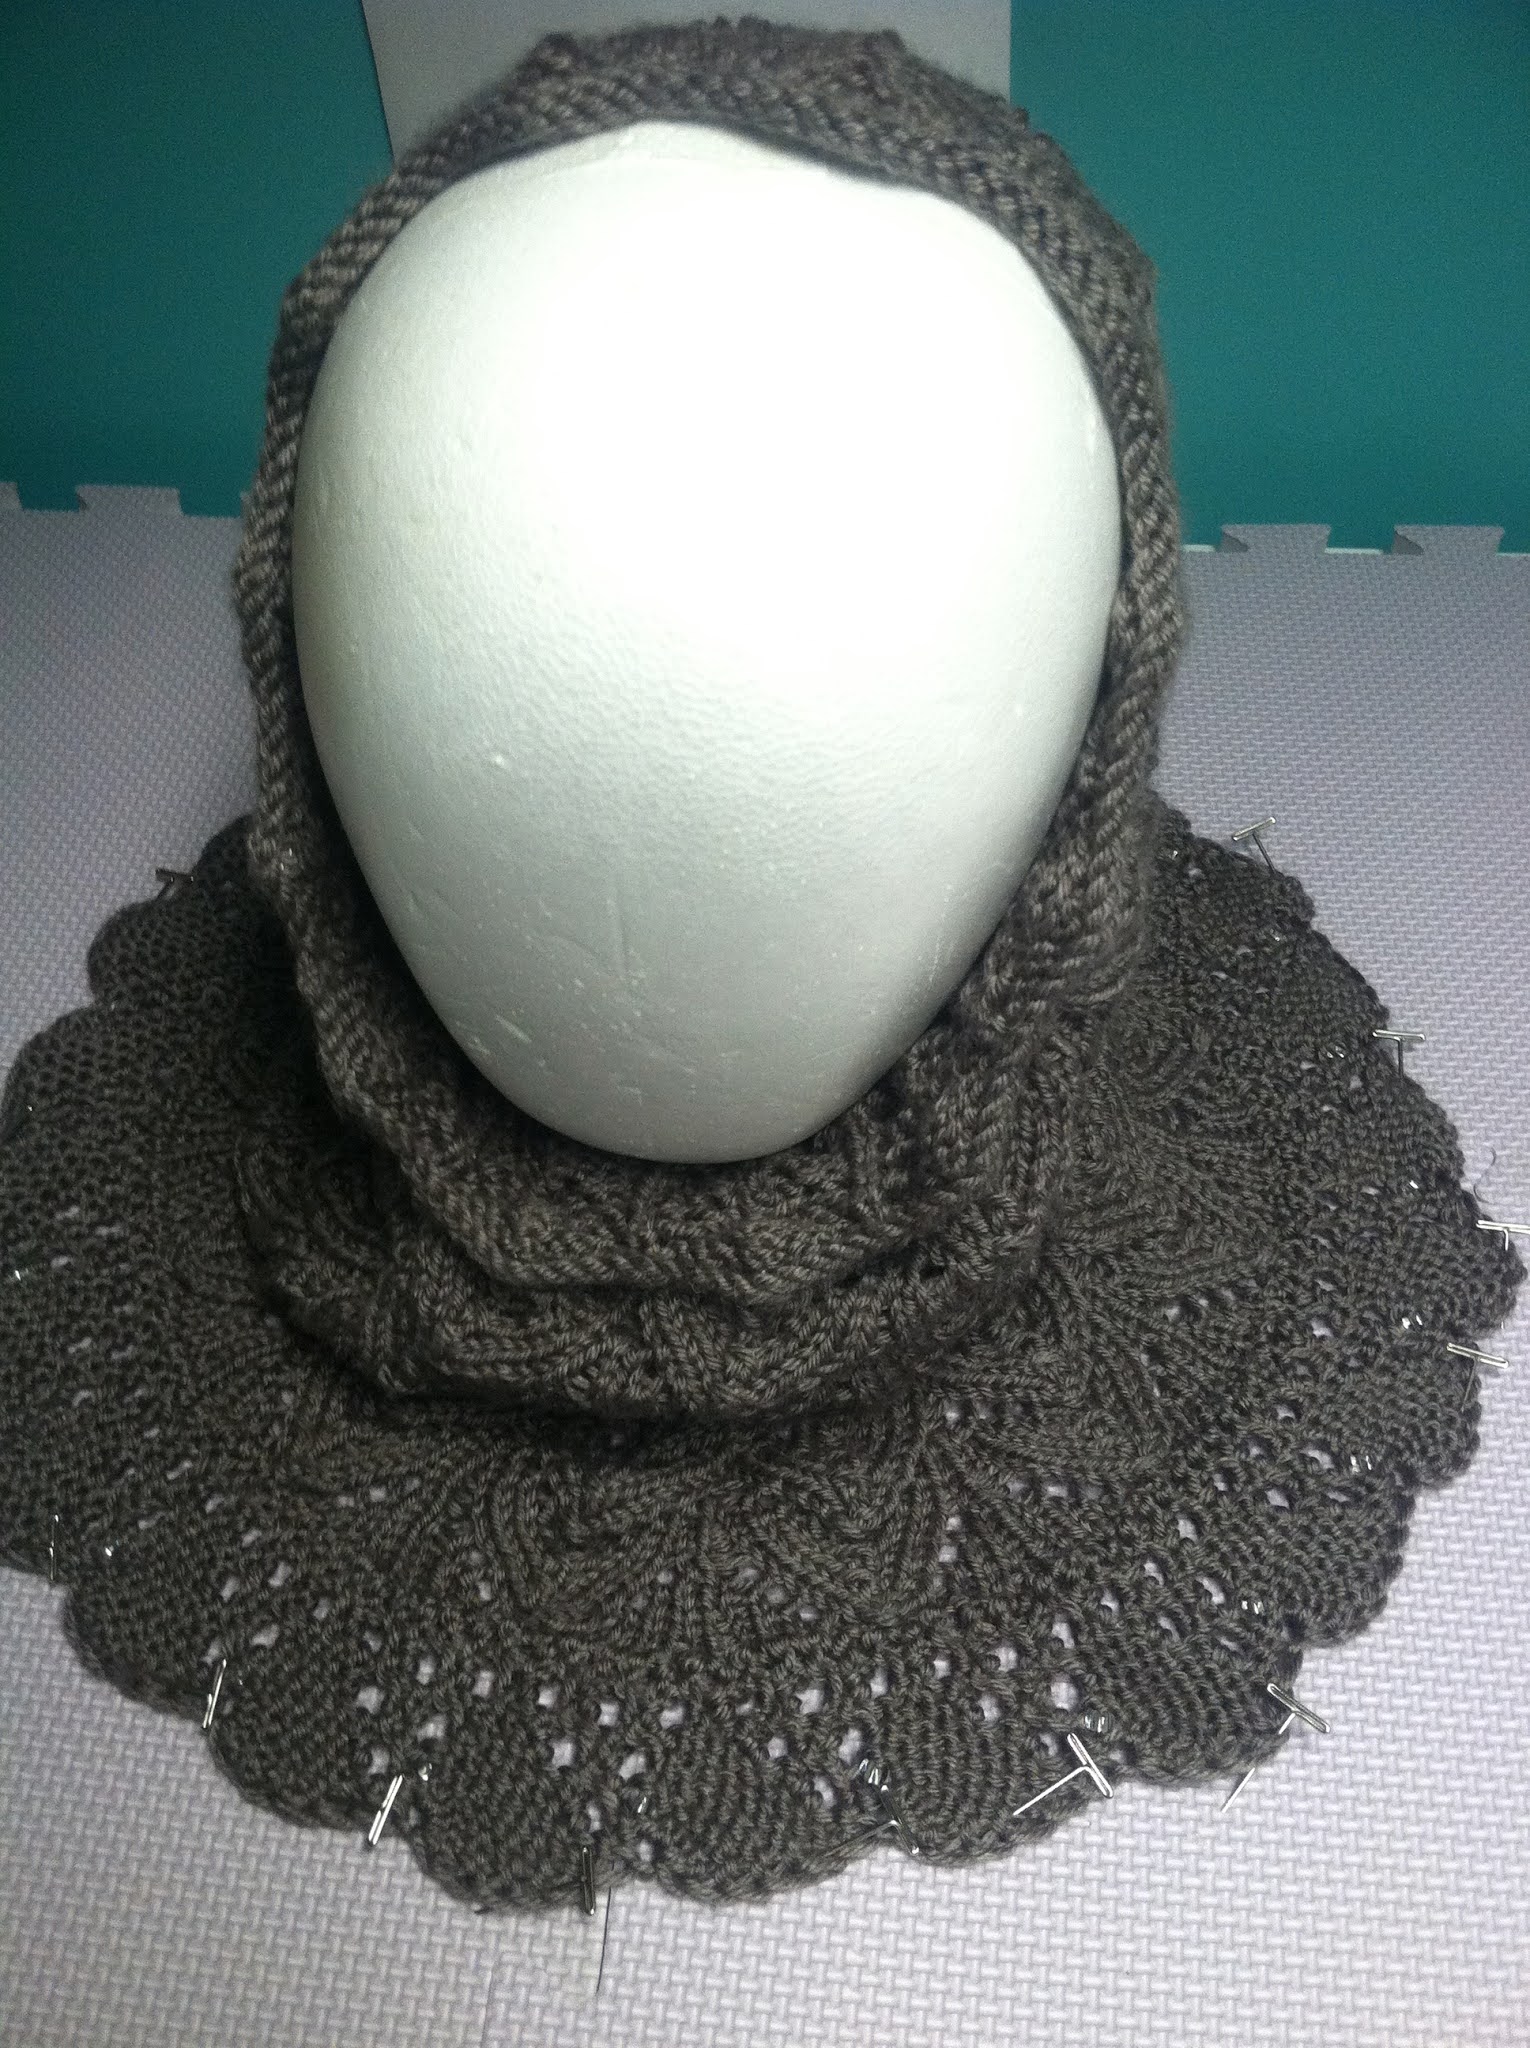
In other news, remember the goose, the one with the beautiful Christmas hat?  Apparently, she is cold and needs a shawl to warm her up.

I was thinking a poncho might work nicely.

I have a poncho design that is really simple.

This was a Yule gift from 2006

So, I am going to make this for the goose.  The pattern is easy.

You measure around the neck and covert your stitches to inches then add an inch for wiggle room making sure it is an even amount.  

Measure your "wingspan".  For me this an actual wingspan for you it will be from the neck to the wrists going down the arms over the shoulder.  Take your row gauge and convert it to inches so you can estimate how many rows you will need.  

You can divide this number into sections or panels or whatever you want.  I did this in two colored bands separated by fancy ribbon but you can use any combination of colors or even a solid color.  I used stockinette because it is easy to do in the round and makes up quick but you could add panels of garter or lace or anything really.

Knit an inch or so in ribbing, I think mine was 10 rounds.  This was 2 x 2 but I have found that I like 1 x1 better for necklines.  Again, it is your preference.

After the ribbing I changed over to stockinette, dividing the stitch count in half and putting a marker at both half points where the shoulders are.

Then I knit two rounds until the end of the poncho changing up colors as I went.

Round 1:  (Knit to marker, YO, K1, YO) twice, knit to end of the round  
Note:  if you didn't want holes you could substitute the YOs for kfbs (Knit front and back) or lifted increases or anything you desire really.

Round 2:  Knit all stitches in the round

Bind off in picot or some other fashion.

See, simple.   This would make a quick gift for a child, friend, or goose in need of some cheer.

So let's go through the process together, shall we?

Here are the goose's measurements:

Neck: 8 inches
Wingspan: 9 1/2 inches
Gauge:  US 6 needle - 5.5 stitches per inch,    rows per inch

The yarn I will be using is Plymouth Select DK Merino Superwash in red with white trim by request of the GooseMother.

So I will be casting on 5.5 stitches per inch x 8-inch neck = 44  stitches which is an even number so the ribbing will work.  I will be adding two inches of wiggle room so my friend will be able to get this over her lovely Goose's head and bill.

Cast on 46 stitches in the round

Join taking care not to twist stitches.  If you do twist the stitches put the twist into the strand at the join.  This info and joining, in general, can be found at the bottom of this post.

Rounds 1 - 10:  knit 1x1 ribbing (K1, P1)

Round 11: Knit all stitches

Round 12:  (Knit to marker, YO, K1, YO) twice, knit to end of the round  

Round 13:  Knit all stitches

Repeat rounds 12 and 13 until garment reaches desired length

My desired length was just past the height of her breast so I stopped the poncho part of the pattern there.

Then I wanted to shape the garment around her body in a gooselike way so I slowly decreased around and added shaping.

Here are my very rough notes.

Abbreviations:
K - knit
K2tog - knit two stitches together
P - purl
pm - place marker
rm - remove marker
RS - right side
sm - slip marker
SSK - slip two stitches, one at a time, then take your left-hand needle through both the front loops of the slipped stitches and knit them
WS - wrong side

Switch to flat knitting:


Row 1 WS:  Bind off 5 stitches, K4 stitches, purl to last 10 stitches K10


Row 2 RS:  Bind off 5 stitches, knit to marker, sm, K25, K2tog, pm (this will be called the center marker from now on), K1, SSK, knit to end


Row 3 WS:  Bind off 2 stitches, K4 stitches, Purl to last 7 stitches, K7


Row 4 RS:  Bind off 2 stitches, knit to marker, sm, knit to 2 stitches before the center marker, K2tog, sm,  K1, SSK knit to marker, sm, knit to end


Rows 5 & 6: Repeat Rows 3 & 4  once more


Row 7 WS:  Bind off 2 stitches, K4 stitches, Purl to last 7 stitches, K7


Row 8 RS:  Bind off 2 stitches, knit to marker, sm, K5, SSK, Knit to 2 stitches before the center marker, K2tog, sm, K1, SSK knit to 7 stitches before marker, K2tog, knit to marker, sm, knit to end


Rows 9 through 22: Repeat Rows 7 & 8 7 times


Row 23 WS:  Bind off 2 stitches, K2. rm, K2 stitches, Purl to last 7 stitches, K2.rm, K5


Row 24 RS: Bind off 2 stitches, knit to 2 stitches before center marker, K2tog, sm, K1, SSK, knit to end


Row 25 WS:  Bind off 2 stitches, K4, purl to last 7 stitches, K7


Row 26 RS: Bind off 2 stitches, knit to 2 stitches before center marker, K2tog, sm, K1, SSK, knit to end


Repeat Rows 25 & 26 until 12 stitches are left


WS bind off: Bind off 2, knit to end


RS bind off:   Bind off 2 knit to end


WS:  Knit all stitches


RS:  SSK, SSK, K2tog, K2tog


WS: Knit all stitches


RS:  SSK,  K2tog


BO 2 stitches


Weave in ends and crochet around all edge stitches.  Then I added a picot and a little bow to the front neck area.


I think she came out really cute.


My friend wants me to make her one πŸ˜…


*****

After writing the pattern up for this post I had that "aha" moment that made everything clear to me with my design issue.

I was able to mock up a prototype and test the pattern and I am happy to say that I love it!

Now the project is knitted, sent, and e-mailed.  Yay!

Thank you, Universe for giving me a moment to stretch my creative juices so that I could find the answer that I was looking for!

You can't use up creativity.  The more you use, the more you have.  
- Maya Angelou
Happy creating!
πŸ€—

***************************

Whatever path of light you follow, may your season be safe and full of joy.  Bright Blessings!

****************************

Safe socially-distanced hugs  πŸ€—


****************************
Sending love and light to everyone being affected by this virus.  

May you be safe.  

May your loved ones be safe.  

πŸ™

***************************

Sending love and light to everyone facing discrimination, hate, prejudice, inequality, or racism.
πŸ™πŸ™πŸ’–πŸ’–πŸ™πŸ™


Wednesday, December 02, 2020

Beyond the Glass

I saw something today that gave me a moment of pause.

In the glass-half-empty, glass-half-full debate I have always been on the glass-half-full side, and I still am.

But what if you started with an empty glass?  

Now fill it with all your friends, family, and support communities whether they be in person or online.

Fill it with the home that shelters you from the elements and the food that you consume each day.   

Fill it with all of the happy cherished memories that you hold close to your heart.

Fill it with your talents and all those amazing things that make you...well, you.

My glass is already bursting, it is overflowing with blessings and treasured moments in time and I haven't even begun to list all the things that bring me joy each day...like the sun rising in hues of pink and gold or seeing a vibrant butterfly on a summer's day.  I haven't even filled it with miracles or rainbows yet or days at the beach or the quiet moments after a snowfall.

The truth is the "glass" is chosen by us as a measure of what we deem as our portion.  The size of that glass changes as our point of view on how our life experience is measured evolves or devolves as we grow.

The glass is just a metaphor.  There is no size to the glass except what you give it.

*********

This reminds me of lace.  Many times when you make lace it just looks like a holey mess.  

Some lace needs some help to bloom and grow and become so much greater than how it looked on the needles.  We can do this by blocking it and this process is not limited to lace.

Blocking is the process of wetting, pressing or steaming finished knit pieces to mold them into a certain size and shape.  Wet pieces can be stretched to at least one size bigger then your finished unblocked project.  Looser stitches are easier to stretch by blocking but they may loose some of their definition in elongating the fabric.  Blocking, like swatching is integral to the knitting process for most items.


This lace swatch is folding in on itself and needs a good blocking.

I used my Knitblockers and pins to open the lace motif up and then wet it on the board

There are a bunch of different tools that can be used in blocking.  Rustproof pins, rustproof wires, and colorfast blocking areas are some of the ways that people can block their knits.  I also have sock blockers for socks and there are boards for sweaters so that you can block to certain measurements.  The tools are endless for blocking.


I use a combination of a variety of pins, blocking boards that fit like puzzle pieces so I can block a myraid of things, wires, a steamer and the Knitblockers.  


For this shawl I prewet it and used blocking wires at the top to keep the edge straight and pins at the points, the picture was taken at an angle so it looks askew, but the shawl came out fabulous

For this shawl I used blocking wires at the top and through the points on the sides with pins to hold it all in place and then I wet it on the board


If you have any doubt how your piece will react to blocking use a gauge swatch to practice on.
  This will also allow you to test the colorfastness of the yarn dye.  Pieces of cabling, ribbing and other thicker designs can be ruined by heavy blocking because the yarn becomes stretched.  On the other hand pieces with open patterns like lace can benefit from being stretched tightly.  In the case of lace it opens up the holes and makes the design really shine.


The blocking method you employ depends on the type of yarn you are using.  Introducing heat to a fiber will cause it to change in some way.  It is important to know how your fiber will react by testing a swatch first.  Also the ball band can provide a clue to how to care for your item.


Wool, which includes alpaca, camel, cashmere and sheep’s wool respond well to wet blocking and will stretch and smooth when blocked.  Immerse the item in water to wet it before blocking or warm steam press.  Angora and mohair wools should be wet blocked by spraying the water on the item.  Wool blends should be wet blocked by spraying.  


Cotton can loose its shape so do not over block.  Cotton should be wet blocked or warm/hot steam pressed.  Linen can be wet blocked or warm/hot steam pressed.  Synthetics such as acrylic are difficult to block.  Many synthetic yarns can not be blocked at all and your finished project is the final size and shape of the piece.  Do not press synthetic yarns.  Do not use high heat with synthetic yarns as they can melt or fuse. Novelty yarns will not respond to blocking.  


Before blocking you should have an idea how your item will look.  A drawing or pattern will help you to ensure that you block the items to scale and need.  A pattern will usually tell you how aggressive you need to be in your blocking.  Some shawls need to be really pulled taut when blocking and some fabrics will bow and buckle if you pull them too tight.


Treat each garment in a manner that befits its shape.  For instance, if you have a shawl that has a straight edge you might want to start by running wires through the topmost stitches to ensure that your edge stays straight.  Then you would stretch the topmost edges on each side as I did in the above shawl pictures, holding the fabric taught with pins.  


If there are scallops or points in your shawl you would pin each of those seperately.  I sometimes run blocking wires through the points to help keep their symmetry as I did in the blue shawl or you can pin them individually as I did in the green/yellow shawl.


For this cowl I used a head to hold the draping part of garment and opened up the scalloped lace of the caplet with pins and then wet it on the board


This is an example of pinning each of the points to maintain their shape and blocking wires were used to keep the top edge straight.  This was wet after I put it on the board.


All of these examples could have been pre-wet before blocking but I chose to wet them after they were pinned.  I don't have an actual example of a lace weight item in my photo-roll but in that case I would wet it first to ensure all the lace opens up.  This is a matter of my personal preference though.  In either case this is called wet blocking.


Steam pressing is done with an iron set on “steam” or a hand held steamer.  The heat from the steam is what allows the piece to block.  Do not touch the iron to the item.  You can lay a towel over the piece which will protect the item from heat exposure and keep it clean.  You can steam press either by using a dry pressing cloth with a steam iron, or a wet pressing cloth with a dry iron.  Let your item dry completely before storing or they tend to mold.


Most of all, have fun with blocking.  See what works for you and your garments and how much of a difference just a little blocking can make.


Happy Blocking!  

πŸ€—


******

I had someone ask me if I actually finished the yarn room, and I did!  Yay!  πŸ˜€


Happy Crafting!

****************************

Safe socially-distanced hugs  πŸ€—


****************************
Sending love and light to everyone being affected by this virus.  

May you be safe.  

May your loved ones be safe.  

πŸ™

***************************

Sending love and light to everyone facing discrimination, hate, prejudice, inequality, or racism.
πŸ™πŸ™πŸ’–πŸ’–πŸ™πŸ™