Monday, December 21, 2020

The Goose That Keeps On Giving


*This post takes place over a span of three weeks.*


I've been feeling blocked this week creatively.

I've been trying to push through it and keep up all the other tasks that I have been focused on.  

For example, I was able to wear pants I haven't worn in six years and they were loose which they never were before.  I have been rediscovering clothes that I love that have been just waiting for me in my closet.

I've been working on a part of my holiday shopping each day and I am almost done.  I am still waiting for our cards to arrive so I can work on them and I have some secret gifts I need to mail out.  

I have finished my part of cleaning up the basement in prep for a new floor.  Because of the surge in COVID cases around here, we do not know when we will be able to put it in but at least when we can, we will be able to.  I am going to help hubby clean up his room if he needs me but now he needs to go through all his stuff.

My mind wants to design a memorial in our Family Server for a friend and member that we lost.  😭  I feel like I have to do something but I need to be working on my design.

I have failed a number of times at getting this design to work and failure teaches me what not to do next time but I just keep failing.

I am trying a new idea today and we will see what happens with that.

The trick over the years that I have worked hard to emulate is that just because I have failed in this task, it doesn't make me a failure.
Failure is a bruise, not a tattoo.  - John Sinclair
I like that quote.  So, I will continue trying new things until I get that "aha" moment where everything clicks and a new design is born.

*****

In other news, remember the goose, the one with the beautiful Christmas hat?  Apparently, she is cold and needs a shawl to warm her up.

I was thinking a poncho might work nicely.

I have a poncho design that is really simple.

This was a Yule gift from 2006

So, I am going to make this for the goose.  The pattern is easy.

You measure around the neck and covert your stitches to inches then add an inch for wiggle room making sure it is an even amount.  

Measure your "wingspan".  For me this an actual wingspan for you it will be from the neck to the wrists going down the arms over the shoulder.  Take your row gauge and convert it to inches so you can estimate how many rows you will need.  

You can divide this number into sections or panels or whatever you want.  I did this in two colored bands separated by fancy ribbon but you can use any combination of colors or even a solid color.  I used stockinette because it is easy to do in the round and makes up quick but you could add panels of garter or lace or anything really.

Knit an inch or so in ribbing, I think mine was 10 rounds.  This was 2 x 2 but I have found that I like 1 x1 better for necklines.  Again, it is your preference.

After the ribbing I changed over to stockinette, dividing the stitch count in half and putting a marker at both half points where the shoulders are.

Then I knit two rounds until the end of the poncho changing up colors as I went.

Round 1:  (Knit to marker, YO, K1, YO) twice, knit to end of the round  
Note:  if you didn't want holes you could substitute the YOs for kfbs (Knit front and back) or lifted increases or anything you desire really.

Round 2:  Knit all stitches in the round

Bind off in picot or some other fashion.

See, simple.   This would make a quick gift for a child, friend, or goose in need of some cheer.

So let's go through the process together, shall we?

Here are the goose's measurements:

Neck: 8 inches
Wingspan: 9 1/2 inches
Gauge:  US 6 needle - 5.5 stitches per inch,    rows per inch

The yarn I will be using is Plymouth Select DK Merino Superwash in red with white trim by request of the GooseMother.

So I will be casting on 5.5 stitches per inch x 8-inch neck = 44  stitches which is an even number so the ribbing will work.  I will be adding two inches of wiggle room so my friend will be able to get this over her lovely Goose's head and bill.

Cast on 46 stitches in the round

Join taking care not to twist stitches.  If you do twist the stitches put the twist into the strand at the join.  This info and joining, in general, can be found at the bottom of this post.

Rounds 1 - 10:  knit 1x1 ribbing (K1, P1)

Round 11: Knit all stitches

Round 12:  (Knit to marker, YO, K1, YO) twice, knit to end of the round  

Round 13:  Knit all stitches

Repeat rounds 12 and 13 until garment reaches desired length

My desired length was just past the height of her breast so I stopped the poncho part of the pattern there.

Then I wanted to shape the garment around her body in a gooselike way so I slowly decreased around and added shaping.

Here are my very rough notes.

Abbreviations:
K - knit
K2tog - knit two stitches together
P - purl
pm - place marker
rm - remove marker
RS - right side
sm - slip marker
SSK - slip two stitches, one at a time, then take your left-hand needle through both the front loops of the slipped stitches and knit them
WS - wrong side

Switch to flat knitting:


Row 1 WS:  Bind off 5 stitches, K4 stitches, purl to last 10 stitches K10


Row 2 RS:  Bind off 5 stitches, knit to marker, sm, K25, K2tog, pm (this will be called the center marker from now on), K1, SSK, knit to end


Row 3 WS:  Bind off 2 stitches, K4 stitches, Purl to last 7 stitches, K7


Row 4 RS:  Bind off 2 stitches, knit to marker, sm, knit to 2 stitches before the center marker, K2tog, sm,  K1, SSK knit to marker, sm, knit to end


Rows 5 & 6: Repeat Rows 3 & 4  once more


Row 7 WS:  Bind off 2 stitches, K4 stitches, Purl to last 7 stitches, K7


Row 8 RS:  Bind off 2 stitches, knit to marker, sm, K5, SSK, Knit to 2 stitches before the center marker, K2tog, sm, K1, SSK knit to 7 stitches before marker, K2tog, knit to marker, sm, knit to end


Rows 9 through 22: Repeat Rows 7 & 8 7 times


Row 23 WS:  Bind off 2 stitches, K2. rm, K2 stitches, Purl to last 7 stitches, K2.rm, K5


Row 24 RS: Bind off 2 stitches, knit to 2 stitches before center marker, K2tog, sm, K1, SSK, knit to end


Row 25 WS:  Bind off 2 stitches, K4, purl to last 7 stitches, K7


Row 26 RS: Bind off 2 stitches, knit to 2 stitches before center marker, K2tog, sm, K1, SSK, knit to end


Repeat Rows 25 & 26 until 12 stitches are left


WS bind off: Bind off 2, knit to end


RS bind off:   Bind off 2 knit to end


WS:  Knit all stitches


RS:  SSK, SSK, K2tog, K2tog


WS: Knit all stitches


RS:  SSK,  K2tog


BO 2 stitches


Weave in ends and crochet around all edge stitches.  Then I added a picot and a little bow to the front neck area.


I think she came out really cute.


My friend wants me to make her one πŸ˜…


*****

After writing the pattern up for this post I had that "aha" moment that made everything clear to me with my design issue.

I was able to mock up a prototype and test the pattern and I am happy to say that I love it!

Now the project is knitted, sent, and e-mailed.  Yay!

Thank you, Universe for giving me a moment to stretch my creative juices so that I could find the answer that I was looking for!

You can't use up creativity.  The more you use, the more you have.  
- Maya Angelou
Happy creating!
πŸ€—

***************************

Whatever path of light you follow, may your season be safe and full of joy.  Bright Blessings!

****************************

Safe socially-distanced hugs  πŸ€—


****************************
Sending love and light to everyone being affected by this virus.  

May you be safe.  

May your loved ones be safe.  

πŸ™

***************************

Sending love and light to everyone facing discrimination, hate, prejudice, inequality, or racism.
πŸ™πŸ™πŸ’–πŸ’–πŸ™πŸ™


Wednesday, December 02, 2020

Beyond the Glass

I saw something today that gave me a moment of pause.

In the glass-half-empty, glass-half-full debate I have always been on the glass-half-full side, and I still am.

But what if you started with an empty glass?  

Now fill it with all your friends, family, and support communities whether they be in person or online.

Fill it with the home that shelters you from the elements and the food that you consume each day.   

Fill it with all of the happy cherished memories that you hold close to your heart.

Fill it with your talents and all those amazing things that make you...well, you.

My glass is already bursting, it is overflowing with blessings and treasured moments in time and I haven't even begun to list all the things that bring me joy each day...like the sun rising in hues of pink and gold or seeing a vibrant butterfly on a summer's day.  I haven't even filled it with miracles or rainbows yet or days at the beach or the quiet moments after a snowfall.

The truth is the "glass" is chosen by us as a measure of what we deem as our portion.  The size of that glass changes as our point of view on how our life experience is measured evolves or devolves as we grow.

The glass is just a metaphor.  There is no size to the glass except what you give it.

*********

This reminds me of lace.  Many times when you make lace it just looks like a holey mess.  

Some lace needs some help to bloom and grow and become so much greater than how it looked on the needles.  We can do this by blocking it and this process is not limited to lace.

Blocking is the process of wetting, pressing or steaming finished knit pieces to mold them into a certain size and shape.  Wet pieces can be stretched to at least one size bigger then your finished unblocked project.  Looser stitches are easier to stretch by blocking but they may loose some of their definition in elongating the fabric.  Blocking, like swatching is integral to the knitting process for most items.


This lace swatch is folding in on itself and needs a good blocking.

I used my Knitblockers and pins to open the lace motif up and then wet it on the board

There are a bunch of different tools that can be used in blocking.  Rustproof pins, rustproof wires, and colorfast blocking areas are some of the ways that people can block their knits.  I also have sock blockers for socks and there are boards for sweaters so that you can block to certain measurements.  The tools are endless for blocking.


I use a combination of a variety of pins, blocking boards that fit like puzzle pieces so I can block a myraid of things, wires, a steamer and the Knitblockers.  


For this shawl I prewet it and used blocking wires at the top to keep the edge straight and pins at the points, the picture was taken at an angle so it looks askew, but the shawl came out fabulous

For this shawl I used blocking wires at the top and through the points on the sides with pins to hold it all in place and then I wet it on the board


If you have any doubt how your piece will react to blocking use a gauge swatch to practice on.
  This will also allow you to test the colorfastness of the yarn dye.  Pieces of cabling, ribbing and other thicker designs can be ruined by heavy blocking because the yarn becomes stretched.  On the other hand pieces with open patterns like lace can benefit from being stretched tightly.  In the case of lace it opens up the holes and makes the design really shine.


The blocking method you employ depends on the type of yarn you are using.  Introducing heat to a fiber will cause it to change in some way.  It is important to know how your fiber will react by testing a swatch first.  Also the ball band can provide a clue to how to care for your item.


Wool, which includes alpaca, camel, cashmere and sheep’s wool respond well to wet blocking and will stretch and smooth when blocked.  Immerse the item in water to wet it before blocking or warm steam press.  Angora and mohair wools should be wet blocked by spraying the water on the item.  Wool blends should be wet blocked by spraying.  


Cotton can loose its shape so do not over block.  Cotton should be wet blocked or warm/hot steam pressed.  Linen can be wet blocked or warm/hot steam pressed.  Synthetics such as acrylic are difficult to block.  Many synthetic yarns can not be blocked at all and your finished project is the final size and shape of the piece.  Do not press synthetic yarns.  Do not use high heat with synthetic yarns as they can melt or fuse. Novelty yarns will not respond to blocking.  


Before blocking you should have an idea how your item will look.  A drawing or pattern will help you to ensure that you block the items to scale and need.  A pattern will usually tell you how aggressive you need to be in your blocking.  Some shawls need to be really pulled taut when blocking and some fabrics will bow and buckle if you pull them too tight.


Treat each garment in a manner that befits its shape.  For instance, if you have a shawl that has a straight edge you might want to start by running wires through the topmost stitches to ensure that your edge stays straight.  Then you would stretch the topmost edges on each side as I did in the above shawl pictures, holding the fabric taught with pins.  


If there are scallops or points in your shawl you would pin each of those seperately.  I sometimes run blocking wires through the points to help keep their symmetry as I did in the blue shawl or you can pin them individually as I did in the green/yellow shawl.


For this cowl I used a head to hold the draping part of garment and opened up the scalloped lace of the caplet with pins and then wet it on the board


This is an example of pinning each of the points to maintain their shape and blocking wires were used to keep the top edge straight.  This was wet after I put it on the board.


All of these examples could have been pre-wet before blocking but I chose to wet them after they were pinned.  I don't have an actual example of a lace weight item in my photo-roll but in that case I would wet it first to ensure all the lace opens up.  This is a matter of my personal preference though.  In either case this is called wet blocking.


Steam pressing is done with an iron set on “steam” or a hand held steamer.  The heat from the steam is what allows the piece to block.  Do not touch the iron to the item.  You can lay a towel over the piece which will protect the item from heat exposure and keep it clean.  You can steam press either by using a dry pressing cloth with a steam iron, or a wet pressing cloth with a dry iron.  Let your item dry completely before storing or they tend to mold.


Most of all, have fun with blocking.  See what works for you and your garments and how much of a difference just a little blocking can make.


Happy Blocking!  

πŸ€—


******

I had someone ask me if I actually finished the yarn room, and I did!  Yay!  πŸ˜€


Happy Crafting!

****************************

Safe socially-distanced hugs  πŸ€—


****************************
Sending love and light to everyone being affected by this virus.  

May you be safe.  

May your loved ones be safe.  

πŸ™

***************************

Sending love and light to everyone facing discrimination, hate, prejudice, inequality, or racism.
πŸ™πŸ™πŸ’–πŸ’–πŸ™πŸ™


Wednesday, November 25, 2020

The Blessing of Being Present

Me and DH in 2005 at the Outback

Somewhere in this pandemic year, I have come to realize that the things I do for my family, the house, our cats, and myself are all worth it.  They aren't drudgeries that I have to do every day, they are blessings that I am able to do for myself and others.

I knew this, of course, it isn't a new shocking revelation.

But, it also is.

For instance, now I look forward to doing dishes after a meal.  I like the warm soapy mediation time that I have with me and the pots and pans.  

If I am doing dishes then I know that my family just ate a meal and that in itself is a blessing.

Also, a part of me knows that all these pots and pans came up from me cleaning the basement and that makes me smile.

I always try to help out with the dishes anywhere that I eat because I know how much time and effort goes into fixing a meal.

When I wash them I like to think of the wonderful meal that we just ate, even as I am scrubbing the evidence of it away from the surface of my dishes.

Each pot, pan, or dish gets my individual attention and some need more time than others to get clean.

Being mindful while doing a task keeps your mind focused on every aspect of it.  Mindfulness is what turns the ordinary into a meditation.

What is mindfulness?

Mindfulness is staying present in the moment intentionally without judgment.  It is noticing what is going on in the moment and in this moment, this now there is no past no future.

This is hard for a society that is forced to be moving towards the next thing on autopilot.

We are always doing.

Meditation is being.

Meditation is being aware of the smallest things like how the warm soapy bubbles feel on my skin as I wash a dish.  

Meditation is noticing a chip in the plate I am cleaning and being more gentle with it.

Meditation is doing one task with all of your senses focused on that task.

When I begin a new task, it starts with a breath.  My breath signals my body that I am slowing down and my mind then focuses on the task.  

If I start to feel rushed or any emotion that takes me away from my meditative state, I thank it and ask it if it would like to sit awhile with me while I finished my task.

Sometimes the panic starts to rise up in me and I have to stop and take another breath.  Panic is a stress response.  The opposite of this is the relaxation response.  

In a panicked state, your nervous system is ramping up with nervousness, dizziness, nausea, increased heart rate, sweating, trembling, and/or an increased respiratory response. 

In a relaxed state, your nervous system is ramping down with a lower heart rate, lower blood pressure, and muscle relaxation.

This relaxed state also promotes better memory, reduced stress and anxiety, clearer thinking, and increases imagination and creativity.

I have had panic attacks for as long as I can remember.  These last few years I have been able to feel my body changing and I can usually tell people that I am experiencing an attack.  This is huge!  I used to just get more and more freaked out and I didn't know why and the people around me wouldn't know what was going on, which freaked me out more.

The one thing that will change the course of the panic attack for me is to stop and breathe.

If I can get that one breath then I can start the process of reversing all the biological changes that accompany my panic attack.

The very next thing I need to do is turn inward.  Panic comes from some fear.  It could be irrational and usually is, but it is based on something, usually deep down within me.

In the beginning, this step was really hard because there was a part of me that wanted the panic.  I'm not sure why.  I don't like the feeling of it or losing control like that.

Also, while I am trying to undo the panic there is a negative loop playing in my head that is so not productive.  But we are taught in meditation that just ignoring the monkeys in our minds is never going to happen.  

These fears are a part of us, they are there because we created them through events or things we decided were part of our belief system.

To ignore them makes them stronger.  To try and know and understand what they are trying to convey to us makes them an ally.

Sometimes the fears that lie in us are valid but many times they are irrational.  Even though they are irrational, they are a part of you that is afraid of something, and just ignoring them will only continue the cycle.

This part can take years or days depending on the fear but adding meditation to your self-care routine can help immensely by creating a ritual of being able to calm yourself down.

And it all begins with a breath.

When I was panicking about cleaning up my knitting from the basement it took some serious introspection and listening to my inner voice to realize what it was that I was so scared of.  

See an irrational fear looks like this, mice defecated on my stuff and their poop can be toxic and kill me.  I don't want to die, therefore I will never go back down in the basement.

There is a truth to this.  The hantavirus, which I wrote about in this post, is dangerous and often deadly.

So, I had a talk with my fear about how could we both be happy here?  I was listening and I understood the danger.  To just dismiss the issue would keep me having a sense of dread every time I went down in the basement.

I came up with a solution that worked for my fear as well as me.  I would always wear a mask, I do that all the time anyway right?  I would always wear gloves and clean up all the areas with a disinfectant that would kill the virus.  I would be cautious and throw away all the things that were defecated on even if they were precious to me.

I would take my time and treat each area like it had the virus even if it is rare in this area of the country.

The pandemic gave me a lot of practice with this mindset.  We do a lot of things that people think are unnecessary until they became necessary.  We thought it would be easier to do them all along and make them part of our routine than to only do them when things get really bad.

So it is with the basement.  I am cautious and keep to the deal that I made with myself and there has been no panic about the basement since and I have been able to clean and organize and throw things away.

I am really proud of not only being able to understand what my inner self was trying to convey but to move beyond it in a positive way.

I never would have come to this point without meditation.  It allowed me to step back and see things differently.  It allowed me the moment I needed to take a breath.  It allowed me to cultivate peace and harmony within me that I can now reach for when I start to panic.

Meditation changed my entire being.

********
In the nineteenth century, knitting was prescribed to women as a cure for nervousness and hysteria. Many new knitters find this sort of hard to believe because, until you get good at it, knitting seems to cause those ailments.
 Stephanie Pearl-McPhee, At Knit's End: Meditations for Women Who Knit Too Much 

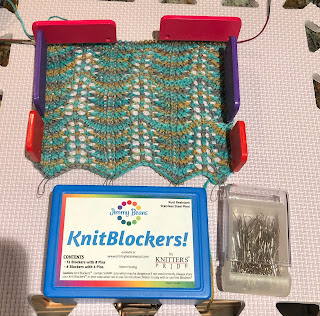
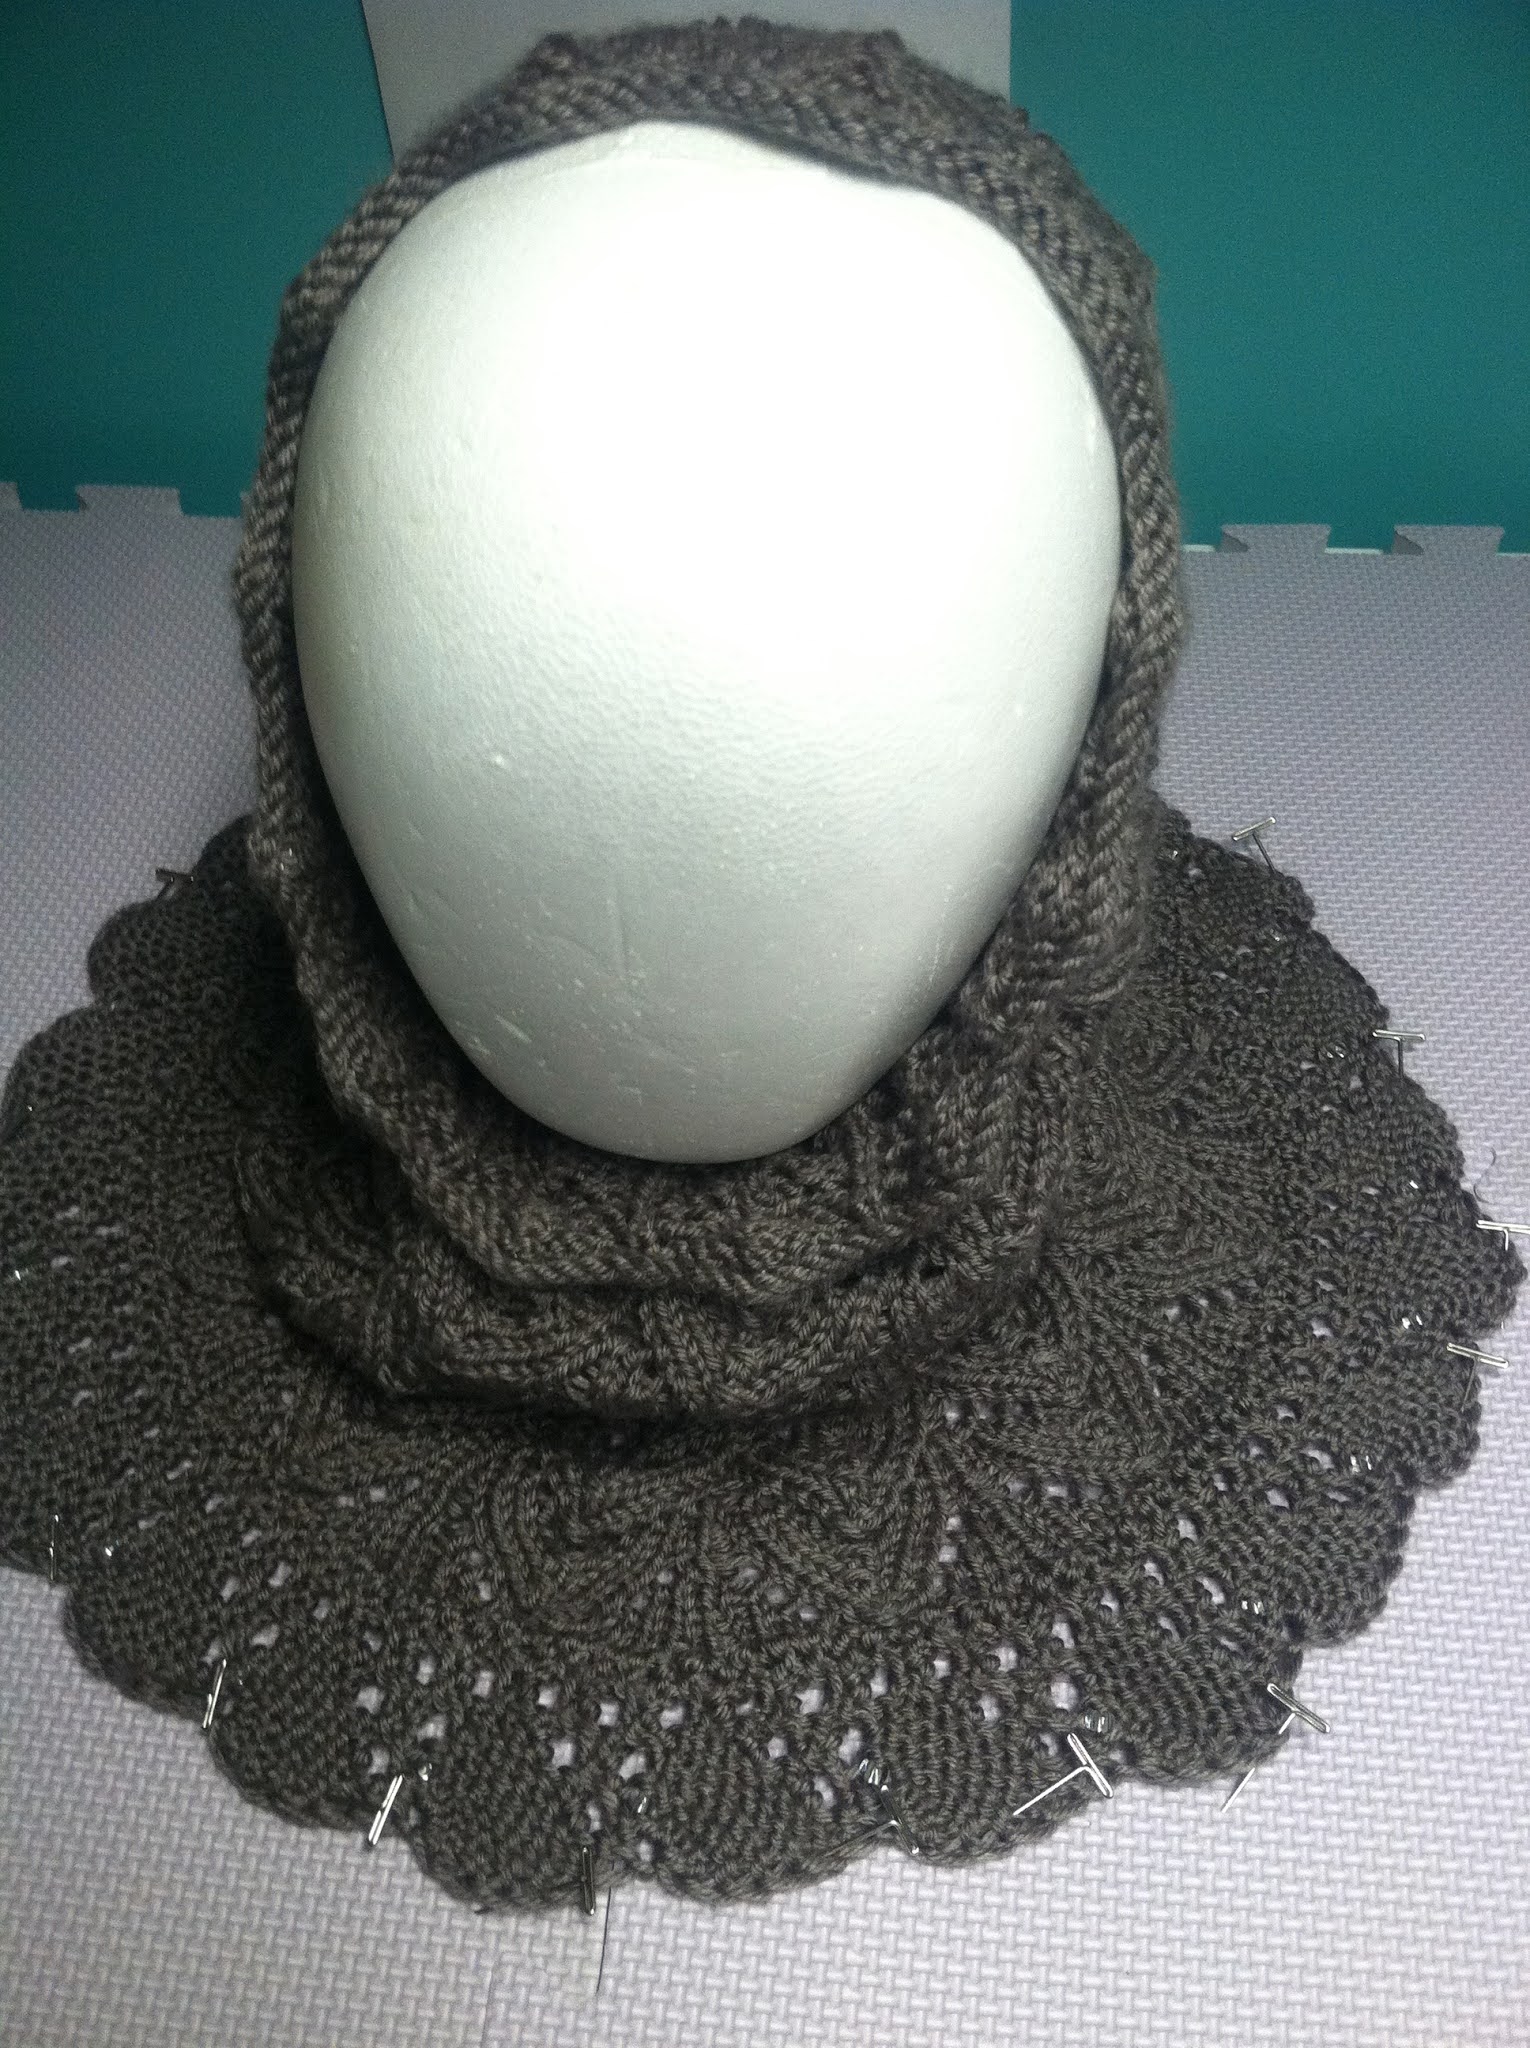
All jokes aside, knitting, crochet, weaving, and other fiber arts are all at their core very meditative.  They promote mindfulness by focusing your mind on creating a specific pattern, usually through repetition of stitches or a repeat.

Here are a few ways of promoting mindfulness when knitting:

Pause, take a breath.  You can do this in the beginning.  You can do this between rows.  It doesn't matter when you do it as long as your breath is part of the session.  I like to remind myself at the beginning of each row to breathe.  If the rows are really long I might do it at each repeat.

Create a goal, affirmation, or intention for the session.  This could be as simple as I want to complete two rows or as deep as with each stitch I release a little of my stress.  I like to make a mantra which is just a string of words that have meaning to me that one repeats over and over like, "breathe in, a sheep in the sun, we are all connected."  This is my way of being one with the originator of my fiber, the sheep.  The sheep took in air from the sky, fire from the sun, water from the rain, and grass from the earth.  In connecting to the sheep, I am connecting to nature itself.

Do not rush, this isn't the time to finish that project that is due tomorrow.  This is a time where every stitch is created with a purpose, with love, or whatever positive emotion you are bringing into your session.  If you only have so much time, set a timer.  Don't look or worry about the clock, it doesn't exist right now, only the now exists.

Do not judge yourself harshly for making a mistake.  Mistakes happen.  Dropped stitches happen.  You can look on my sidebar > over there under fixes for a few ways to be ready for these things should they happen.

Invite in elements that you find relaxing like a certain tea, calming music, or that special chair.

Work with fibers that delight the senses.  I love soft wools that are vibrant and have good stitch definition.  I love watching colors change and dance between my fingers.  I love a fiber that feels buttery soft and slides between my fingers.

Use tools that you enjoy.  I love smooth beautiful needles.  I have an array of colored woods that I use that are just a delight to work with.  The stitches stay put enough that they don't get all willy nilly but still glide enough that they are fluid.

Maybe this is the time to use that special stitch marker your good friend gave you or some other meaningful gadget or gizmo that holds a place in your heart but yet is hardly used.

Or add elements that make you happy and bring you joy to your kitting time.  There is no one way or one right way.  Everyone is different.  Find what works for you.

Until next time, Happy Thanksgiving to those that celebrate.

and...Happy Crafting!

****************************

Safe socially-distanced hugs  πŸ€—


****************************
Sending love and light to everyone being affected by this virus.  

May you be safe.  

May your loved ones be safe.  

πŸ™

***************************

Sending love and light to everyone facing discrimination, hate, prejudice, inequality, or racism.
πŸ™πŸ™πŸ’–πŸ’–πŸ™πŸ™


Wednesday, November 18, 2020

Nothing is Ever Forgotten


In September of last year I started to clean up my yarn room.  I had only had my yarn room for a few years when we had a flood that destroyed the floor in my room, and the hallways.  My hubby also had a lot of damage to his computer room.

Then the kitchen was transferred downstairs while the repairs were going on and somewhere in all of that we never put the house back together.

When I finally got it clean enough to walk in the door, I found out a mouse or three had set up shop in my knitting.  I had to throw so many things away that were chewed on or worse.


As you can see, these boxes are full of yarn.  Most of what is in the guest room right now is all yarn.  I have gone through all the yarn I own painstakingly..lovingly even.

I had laid out a very detailed trackback plan in this post.  I probably should not have used dates to achieve each of the goals on my list.  Some of the weeks took months but I kept at it.

I am pretty much where I wanted to be at week 7 of my trackback plan and I am not going to get on myself about how long it took.  During that time I was also cleaning up hubby's room as well and dealing with the challenges of a global pandemic.  

One of the things I learned in this project was to not be so hard on myself.  I made a promise to myself to bring up one thing or throw one thing away every day in this post and I have done that.


The floor is not pretty but it is mostly clean of clutter.  Now we just need to move all of hubby's room somewhere so we can get the floors done again.

I am so happy.  There is an end in sight.  😊

Not only have I rediscovered scads of yarn that I had forgotten that I had, and projects that I thought were lost but we will be able to move the yarn that is upstairs downstairs.

My kind and understanding family has put up with my projects everywhere and never said a word about it.  I can't wait to have everything except the things that I am working on in one place again.

I can't wait to have my yarn organized by weight again.

But mostly, it will be wonderful to heal our house.  I feel that she has been just waiting to be clean and whole again and not forgotten.

Nothing is ever really forgotten.

Maybe just misplaced...for a time.

****************************************

In knitting, it is easy to misplace or omit a stitch when doing a pattern.  Unless you are counting all your stitches on each row you probably won't find that misplaced or omitted stitch until after you finish your resting row.


This chart is read from right to left for the odd (RS) rows and left to right for the even (WS) rows.

Abbreviations

K - Knit

P - Purl

SK2P - Slip the first stitch purlwise, knit the next two stitches together, and pass the slipped stitch over the stitch made by the K2tog

YO - yarn over

Chart Example Written Directions

Row 1 (RS): P1, YO, K3, SK2P, K3, YO, P1  (11 sts)

Row 2 and all WS rows: Purl to end  (11 sts)

Row 3: P1, K1, YO, K2, SK2P, K2, YO, K1, P1  (11 sts)

Row 5: P1, K2, YO, K1, SK2P, K1, YO, K2, P1  (11 sts)

Row 7: P1, K3, YO, SK2P, YO, K3, P1  (11 sts)

As you can see, this pattern maintains 11 stitches throughout.

In my sample below of this chart.  I have put the repeat between markers to make it easy to identify.

I made my mistake on Row 1.  If you count the stitches you will notice that there are only 10.  A stitch has been forgotten.


A skill that I have found invaluable in my knitting is to be able to read my stitches.  It has helped me time and time again in both knitting and tinking.

This sample starts with a purl stitch, then three knits, an SK2P, three more knits, a yarn over, and then the last purl stitch.

If we check the pattern there is a yarn over missing.

Don't panic!  There is no reason to rip out this row.  

Method #1:

There are a few ways that you can tackle this problem.  You could just use a locking stitch marker to indicate where the yarn over should be and then move the stitches carefully and put in a yarn over.

Use your right-hand needle tip from the back to the front to pick up the bar that is between the stitches.  Place this stitch on the needle with the right leg in the front.  Make sure it is not twisted.  (Though, if it is twisted, just purl through the back loop on the other side and it will turn back into a yarn over...move on that a bit later.

This method works fine but sometimes the yarn over is smaller than the others.  Some of my students have worried about losing a stitch while moving them about.  Just do it slow and slip them tip-to-tip to avoid dropping a stitch.

A Bit About Yarn Overs

Yarn overs can be added, dropped, or moved.  If they are twisted they can be untwisted.  If they are twisted they can become stitches when worked.  This method is known as the bar increase or a make 1 (M1).  They are really versatile little creatures.

When you pick up the bar to make a yarn over make sure that your right leg is in front of the needle.  This ensures that you will be making a yarn over on the following row.  If the front leg is on the left, this means the stitch is twisted.

If this is your intention, then it will make a new stitch on the following row.  If it is not your intention you can purl it through the back loop, thus untwisting it.

This method also works for other twisted stitches.  If you are tinking back and some of your stitches are twisted you can either knit or purl them through the back loop to untwist them.

Finally, if you made your yarn over in the wrong place, you can drop it and move to the section where it should be and add it there.  Gently move the slack along so it evenly dispersed to the new stitch.

Method #2:  

Or you could use a locking stitch marker to indicate where the yarn over should be and then work your purl row up to that point and add the yarn over in on the purl side.

This is the method I use all the time.  You can fix almost anything on the purl row between the working rows.  If you forgot to pass that last part of the SK2P stitch you can do it before you purl it.  If you twisted a stitch then you can purl it through the back loop to fix it.  And finally, if you forgot to yarn over it is really easy to add it in.

All of this info can be found in this new video.

I'm trying some close-up knitting.   Please let me know what you think.

Until next time, Happy Crafting!

****************************

If you have any questions regarding this or any of my other tutorials, please feel free to leave a question in the comments.

**********************

Safe socially-distanced hugs  πŸ€—


****************************
Sending love and light to everyone being affected by this virus.  

May you be safe.  

May your loved ones be safe.  

πŸ™

***************************

Sending love and light to everyone facing discrimination, hate, prejudice, inequality, or racism.
πŸ™πŸ™πŸ’–πŸ’–πŸ™πŸ™


Wednesday, November 11, 2020

An Attitude of Gratitude

Our son when he was little feeding a calf at a dairy farm

In Anime, you often hear "itadakimasu" said at meals.  I looked it up and found out that the expression itadakimasu literally means “I am going to receive the lives of animals and plants for my own life",.  Saying this phrase before eating is your acknowledgment that you understand the sacrifice that was made so that you could eat.  It also is a way to show honor for Nature as a whole.

I was very touched by this beautiful way to thank the Earth for the gifts that we are given to consume as well as the sacrifice that creatures and plants make to keep me alive.

I decided to make my own prayer towards this idea of thankfulness and this is what I have been saying before meals for many years now:

Air, Fire, Water Earth, God, Goddess Divine,
I am grateful for this sacrifice of plant and creature of Thine.
Please bless this food and all those who helped bring it to my feast.
Thank you for this gift of life, healing, strength, and inner peace.

You can, of course, change the first line to fit your Dogma.

I feel that everything has a story.  

If you are eating an apple.  That apple was blessed by the elements and Mother Nature.  It was nurtured by a farm full of people, who cared for it, harvested it, and sent it to your store.  There were the people who transported it to the store.  The store unpacked, inspected, and installed that apple in their store.

Was your apple organic or did it come from a local farm?

In choosing it are you making a stance about the environment or supporting our neighbors?

Was it simply an apple that you could afford and knew it would be a healthy choice for your family?

Everything we eat has been brought to us by farmers, truckers, and store employees.  This is why I have that line about blessing all those who helped bring my feast.

These people are so important to our community.  They have been working through the pandemic to make sure that we have food to put on our tables.  

I just want to say, "Thank you!  I deeply appreciate everything you do to keep us fed."

Someone asked in an article I was reading how to thank a farmer and this is what it said:

"Eat and give thanks.  As you eat your meals, take a moment to give thanks for the hands that cared for and produced your food, and say a prayer for the farmer, their family, farm, or ranch. 

You can write your favorite local farm with a letter of thanks.  It means so much.

Go to a farmer's market and talk to the farmers about their products.

Educate yourself about farmers and ranchers with accurate documentaries."

Here are some that inspired me: Dawn to Dusk and Cattle First

I think I would like to add to their list, shop local.  I'm sure you have some farms in your area who are going through a tough time but they still are trying to keep the community fed.  It is almost Thanksgiving, maybe buy a local turkey this year or get autumn vegetables for your feast from your local farms or farmer's markets.

Or you could just learn about where some of your food comes from.    

I was researching some herbs I bought and found out that they came from the oldest organic herbal farm in my state.  Very cool.

I hope this year during Thanksgiving you take a moment to think about all the wonderful people that made your meal possible.  I also wish you and yours a blessed day even if you have to Zoom your family this year and if things aren't as traditional as you would like.  

We are going to have a turkey that was smoked at our local BBQ place, veggies, and desserts from our local farm, and play games online with those we love. 

I know that for most Thanksgiving is ways away but I start a month-long time of thankfulness this time of year...that is different than my daily thankfulness.  I am trying to be more aware of the world around me and how simple things that I take for granted are linked to people, families, and communities.

We really are all connected.

******************************

Speaking of connections...

I was asked the other day how to best join knitting in the round.  Sometimes there is a little gap in between the first and last stitch.  Most times, it goes away as you knit and the yarn is reabsorbed and redistributed.  But sometimes it leaves a gap.

If you are a person who is bothered by this gap, then here are some ways to stop the dreaded gap before it can form.

I feel that in knitting there is never just one way to do anything so I will cite my top three.

Before I do that I must add that when joining in the round always check to make sure all your stitches are going the same way and none are twisted.  

I was a very sad girl when I had cast on 360 stitches for an infinity scarf only to find out that I twisted the cast on three rows in.

But if you notice right away on the first row, when you get to the join start smoothing your knitting from the left-hand needle around, and when you get to where it is twisted, untwist it by taking the needle under or over your work.  That twist is now caught in the join instead of in your work.

If you think it is noticeable after you bind off you can use the weave in method that I mention below to hide the twist.  Most times, I think it disappears into the cast-on.

Number 1:  Extra Stitch

Whatever your pattern calls for, cast on one extra stitch.   

Then when you go to join in the round, take the 1st stitch you cast on and move it purlwise to the right-hand needle.  

Take the last stitch you cast on and pass it over the moved stitch.

Now move that new stitch back to the left-hand needle.

Then, tighten both tails so that your new first stitch is snug and there is no gap.  It may slip a bit as you do your round, just gently tug on those ends again to tighten everything up.

- I use this all the time and it is easy to do.  I think this one looks the best out of the three techniques.

Number 2:  Swapping the first and last stitch

This one does just what it says.  

Take the first stitch off your needle using some method to secure it.  You can pinch it with your finger or you can use a locking stitch marker, whatever works for you.  Hold that stitch to the front of your work.

Now, slip the last stitch, tip-to-tip, to your left-hand needle.  

Place the stitch you are holding on the right-hand needle making sure it didn't get twisted.

Finally, shore up your ends and make sure everything is snug.  It may slip a bit as you do your round, just gently tug on those ends again to tighten everything up.

- I have used this one as well.  Some of my students have found that switching the stitches is problematic.  But on the whole, this one looks pretty good.

Number 3 - Extra yarn

This one I used a lot before I learned the others.  I would knit the first stitch with the tail and the working yarn and the extra bulk would make the gap less noticeable.

This is the one that I would recommend for a beginner who isn't comfortable with slipping stitches yet.  There might still be a little gap, but it shouldn't be as noticeable as if you had used one yarn.

Bonus - If All Else Fails

If the jog isn't too bad you can just use the end to shore things up.  I have to weave in my ends anyway so I usually combine techniques and make an extra loop around the slipknot that mimics a stitch.

I also use this in reverse for weaving in the bind-off tail.

You may have to play around with the tension of this technique but I find it really can create a lovely edge.

First, hold your work so your cast-on edge's tail is on the left-hand side.  

Thread a yarn needle with the tail end.

Go in the vee stitch after the slip knot from the front to the back.

Then go back down into the stitch the tail came from.

Here is a video with all this info.

I just got this channel up and I am still learning how to create videos but each time I think I get a little better at it.  

Until next time, Happy Crafting!

****************************

If you have any questions regarding this or any of my other tutorials, please feel free to leave a question in the comments.

**********************

Safe socially-distanced hugs  πŸ€—


****************************
Sending love and light to everyone being affected by this virus.  

May you be safe.  

May your loved ones be safe.  

πŸ™

***************************

Sending love and light to everyone facing discrimination, hate, prejudice, inequality, or racism.
πŸ™πŸ™πŸ’–πŸ’–πŸ™πŸ™